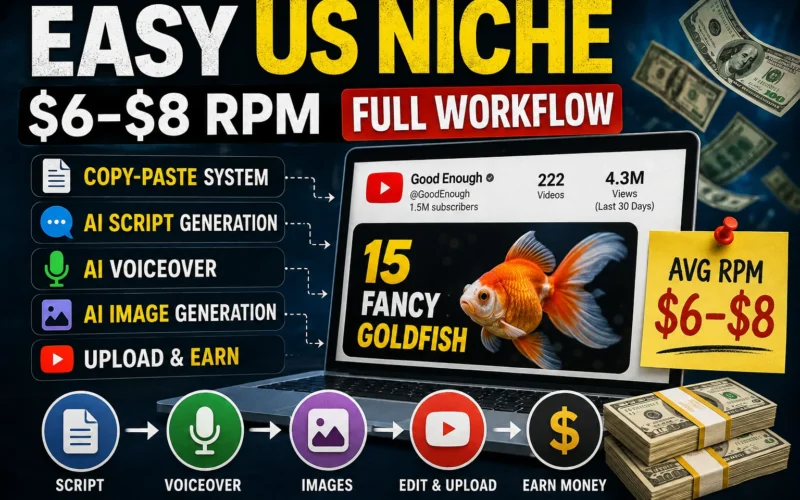
Today, I’m going to show you a YouTube automation niche that is relatively easy to work on and can potentially generate good RPM depending on the audience, geography, topic, and advertiser demand.
More importantly, I’m going to explain the complete workflow behind this type of channel—from finding a topic and writing the script to generating the voiceover, creating images, designing the thumbnail, and analyzing your video before publishing it.
The goal is to make the process as simple as possible.
You won’t need to start everything from scratch. I’ll show you how AI tools can help you organize almost every stage of production.
However, there is one important thing you should understand from the beginning: AI should be used as a production assistant, not as a replacement for originality and human judgment. YouTube says content that is repetitive, mass-produced, or built from generic templates without meaningful original value may not qualify for monetization.
So, keep your own creativity involved throughout the process.
The YouTube Automation Channel Model
Let’s get straight into the workflow.
The type of channel we’re looking at uses a very simple video structure:
- A strong curiosity-based topic
- An engaging script
- Voiceover narration
- AI-generated or properly licensed visuals
- Background music
- A compelling thumbnail
You don’t necessarily need complicated animation or expensive video production.
In this particular format, the three most important components are:
- The script
- The voiceover
- The visuals
If these three elements are strong, the final video can be engaging without requiring complicated editing.
The channel discussed in the original tutorial is based around curiosity-driven topics and list-style videos. The example format includes videos covering unusual, interesting, historical, or surprising subjects.
The key lesson isn’t to copy another channel. Instead, study successful formats and then develop your own original topics, research, storytelling style, visuals, and presentation.
Step 1: Prepare Your Channel Workflow Document
The first thing I recommend creating is a simple document containing two important sections:
1. Channel Overview
This section should explain:
- Your niche
- Your target audience
- Your content categories
- Successful topic patterns
- Competitors
- Video formats
- Typical video length
- Thumbnail style
- Storytelling style
This gives you a complete understanding of the niche before you start producing videos.
2. Master Prompt
The second section is your master AI prompt.
This prompt should contain all the instructions required to generate your content workflow.
Instead of creating a new prompt every time, you can maintain one master prompt and improve it as you learn what works.
The idea is simple:
Copy → Paste → Answer the AI’s questions → Generate your content.
Step 2: Choose Your Video Length
Once you paste your master prompt into an AI assistant, it may ask you how long you want the video to be.
For example:
What length video do you want?
You can choose something like:
10 minutes, 15 minutes, or 20 minutes.
For this workflow, let’s use 15 minutes as an example.
The important thing is not to blindly choose a long duration.
Your video should be as long as necessary to deliver the story properly.
A 10-minute video with excellent retention can be much better than a 20-minute video filled with unnecessary information.
Step 3: Generate Video Topic Ideas
The next step is choosing a topic.
Your AI workflow can provide two options:
Automatic Topic Generation
If you don’t already have a topic, ask the AI to generate multiple ideas.
For example:
“Generate 10 video topics for this channel.”
You may receive 10 potential topics.
But here’s something important:
Don’t let AI make every decision for you.
AI can generate ideas, but you should select the topic yourself.
Look at:
- Search interest
- Competition
- Curiosity
- Potential audience
- Existing successful videos
- Your ability to create a strong story
Your human judgment is still extremely important.
Step 4: Generate the Script in Multiple Parts
Once you’ve selected your topic, the next step is scripting.
For example, let’s say your topic is:
“The Most Brutal Punishments in Human History.”
Instead of asking an AI tool to generate a massive script in one go, divide the script into multiple sections.
For example:
- Part 1 — Opening Hook
- Part 2 — Main Story
- Part 3 — Additional Examples
- Part 4 — Conclusion
This approach makes it easier to control the quality and length of your script.
You can tell the AI:
“Create this script in four parts. When I ask for Part 1, provide only Part 1. When I ask for Part 2, provide only Part 2.”
Then simply type:
Part 1
The AI generates Part 1.
After that:
Part 2
Then Part 3 and Part 4.
This makes the entire scripting process easier to manage.
Step 5: Create a Strong Hook
Your opening is extremely important.
The first few seconds determine whether people continue watching.
Instead of starting with a boring introduction, create a curiosity-driven hook.
For example:
“Some punishments in human history were so brutal that even imagining them today is difficult.”
Then immediately introduce the mystery.
The goal is to make the viewer think:
“Wait… what happened next?”
That curiosity keeps people watching.
Step 6: Analyze Your Script Before Producing the Video
One of the smartest parts of the workflow is analyzing your content before publishing.
There are AI-powered creator tools that can analyze your channel, ideas, scripts, and videos.
These tools can help identify:
- Weak hooks
- Potential retention problems
- Weak endings
- Poor calls to action
- Topic opportunities
- Audience drop-off points
- Potential improvements
Instead of simply asking ChatGPT:
“Give me a YouTube topic.”
A dedicated channel-analysis tool can potentially use information about your channel and competitors to provide more relevant suggestions.
That’s an important difference.
Use a Channel Analytics and Idea Tool
Many modern creator tools provide features such as:
Channel Playbook
You can connect your YouTube channel and receive an overview of your content.
Depending on the tool, you may see information about:
- What is working
- What is losing viewers
- Which videos perform better
- What you should improve
- Potential content opportunities
Connecting your channel is important if you want the analysis to be based on your actual content rather than generic recommendations.
Idea Research
Another useful feature is an Idea Room or similar content-idea section.
This can help you discover potential topics for your next video.
The advantage of using a channel-focused analytics system is that the suggestions can be based on your existing content and audience rather than simply generating random topics.
You can then select an idea and develop it further.
Script Development and Improvement
Once you’ve found an idea, you can work on the script.
Some tools provide options to:
- Develop an idea
- Improve an existing script
- Analyze a script
- Identify weak sections
- Improve the structure
This can be useful before you move to voiceover production.
The goal should be to improve the script—not simply accept whatever AI generates.
Step 7: Analyze Your Video for Audience Retention
This is one of the most useful parts of the workflow.
Before uploading your video publicly, you can analyze it with an AI-powered retention tool.
Upload your finished video and look at the available metrics.
For example, you may receive a score for:
- Hook
- Story structure
- Engagement
- Ending
- Call to action
- Predicted retention
If your tool indicates that the ending is weak, you can improve your CTA.
If the opening is weak, rewrite the first 20–30 seconds.
This creates an important workflow:
Create → Analyze → Improve → Publish
rather than:
Create → Publish → Hope for the best
That’s a much smarter approach.
Step 8: Generate the AI Voiceover
Once your script is ready, it’s time for the voiceover.
You can use several text-to-speech platforms.
One popular option is ElevenLabs.
ElevenLabs provides text-to-speech technology that can convert written scripts into natural-sounding speech and offers multiple voices and languages.
The basic workflow is:
- Open the platform
- Log in
- Go to Text to Speech
- Paste your script
- Select a suitable voice
- Adjust the voice settings if necessary
- Generate the audio
- Download the voiceover
ElevenLabs’ official documentation also recommends entering your text, selecting a voice, adjusting settings if required, and then generating the speech.
Don’t Generate the Entire Script at Once
Here’s an important tip.
Don’t necessarily generate a 15-minute script as one giant voiceover file.
Instead, divide it into smaller sections.
For example:
- Voice Part 1
- Voice Part 2
- Voice Part 3
- Voice Part 4
Why?
Because if something goes wrong in the middle of the generation, you won’t have to regenerate the entire narration.
You can simply replace the problematic section.
It also makes video editing easier.
Step 9: Generate Your Visuals
Now we come to one of the most important parts of this particular YouTube automation format:
Visual generation.
If your video doesn’t require complex animation, you can build the visuals around images that support the narration.
Go back to your AI assistant and ask it to create image prompts based on your script.
For example:
“Create image prompts for Part 1 of my script. Each image should visually represent the narration and maintain a consistent cinematic style.”
The AI can then generate a list such as:
- Image Prompt 1
- Image Prompt 2
- Image Prompt 3
- Image Prompt 4
- Image Prompt 5
And so on.
Step 10: Generate Images With an AI Image Tool
Now take those prompts and use your preferred image-generation platform.
The original workflow mentions Google Flow and other AI image-generation tools.
You can use whatever tool currently provides the quality, licensing terms, and commercial rights that fit your project.
For each image:
- Copy the prompt
- Paste it into the image generator
- Generate the image
- Review the result
- Download it
- Move to the next prompt
Consistency is extremely important.
Try to maintain:
- Similar visual style
- Similar color treatment
- Consistent characters where needed
- Consistent historical details
- Appropriate aspect ratio
Your images should support the story rather than simply fill the screen.
Step 11: Create the YouTube Thumbnail
Your thumbnail is another major part of the workflow.
Ask your AI assistant:
“Create a YouTube thumbnail prompt for this topic.”
The AI can generate a detailed prompt describing:
- Main subject
- Background
- Composition
- Lighting
- Facial expression
- Visual contrast
- Thumbnail text
- Emotional trigger
For example, if your title is:
The Most Brutal Punishment of All Time
your thumbnail could focus on a powerful visual representing the subject with short, readable text.
Keep the text short.
Instead of putting the entire title on the thumbnail, use something like:
WORST PUNISHMENT
or
BRUTAL PUNISHMENT
The thumbnail and title should work together rather than repeat exactly the same information.
Step 12: Add Thumbnail Text Carefully
Sometimes AI image generators don’t produce text correctly.
If the generated thumbnail looks good but the text is wrong, you have several options.
You can:
- Generate another version
- Modify the prompt
- Add the text manually in Canva
- Use Photoshop
- Use another image editor
For serious YouTube channels, manually adding the final text can often give you better control.
Focus on:
- Readability
- Contrast
- Large text
- Simple composition
- One main subject
- Curiosity
Remember that a beautiful thumbnail isn’t necessarily a good thumbnail.
The thumbnail’s job is to make the right viewer want to click.
Step 13: Assemble Everything in Your Video Editor
Now you have almost everything:
Your script
Your voiceover
Your images
Your background music
Your thumbnail
Open your preferred video editor.
You can use tools such as CapCut or another editor you’re comfortable with.
Place the voiceover on the timeline first.
Then synchronize the images with the narration.
For example:
Narration:
“The punishment was designed to…”
Visual:
Show the corresponding historical image.
Then move to the next section.
Don’t randomly place images just because you need something on screen.
Every visual should have a purpose.
Step 14: Add Background Music
Background music can improve the atmosphere of your video.
For historical, mystery, documentary, or curiosity-based content, choose music that matches the mood.
However, make sure you have the proper rights to use the music.
Don’t download random copyrighted music from YouTube or other websites and assume that it is safe to monetize.
Use music from a legitimate licensed source or an appropriate royalty-free library.
Keep the music low enough that the narration remains clear.
Step 15: Export and Review Your Video
Before publishing, watch the entire video from beginning to end.
Check:
- Is the opening strong?
- Is the narration clear?
- Are there awkward AI pronunciations?
- Do images match the narration?
- Are there unnecessary pauses?
- Is the music too loud?
- Does the story flow naturally?
- Is the ending satisfying?
- Is the CTA natural?
Don’t simply upload the first version.
Watch the video like a viewer.
Important: Don’t Turn This Into Mass-Produced AI Content
This is extremely important if your goal is YouTube monetization.
The idea of using AI to create scripts, images, voiceovers, and other production elements does not automatically mean your channel cannot be monetized.
YouTube’s policies indicate that AI can be part of the creation process. However, YouTube specifically warns against repetitive, mass-produced, generic, or low-value content.
For example, simply doing:
AI script → AI voice → random images → upload
over and over again with almost no original contribution can create problems.
Instead, add your own value through:
- Original research
- Original storytelling
- Unique commentary
- Fact-checking
- Better scripting
- Unique visual direction
- Human editing
- Strong narrative structure
- Original analysis
The final video should feel like your channel created it, not like a machine produced another template.
YouTube specifically states that image slideshows and templated content with minimal narrative, commentary, or educational value may be ineligible for monetization.
Step 16: Focus on Quality Instead of Just Quantity
One of the biggest mistakes beginners make with YouTube automation is thinking:
“If I upload 100 videos, one will go viral.”
That’s not a reliable strategy.
Instead, focus on building a repeatable system where every video gets better.
For example:
Video 1
Learn how to improve your hook.
Video 2
Improve your thumbnails.
Video 3
Improve your storytelling.
Video 4
Improve your retention.
Video 5
Improve your topic selection.
Eventually, you have a complete production system.
The Complete AI YouTube Automation Workflow
Here’s the entire process in simple form:
Step 1: Choose your niche
↓
Step 2: Research successful channels
↓
Step 3: Find a topic
↓
Step 4: Generate and improve the script
↓
Step 5: Divide the script into sections
↓
Step 6: Generate the voiceover
↓
Step 7: Create image prompts
↓
Step 8: Generate the visuals
↓
Step 9: Create the thumbnail
↓
Step 10: Edit the video
↓
Step 11: Analyze retention and quality
↓
Step 12: Improve weak sections
↓
Step 13: Upload and optimize
↓
Step 14: Study the results
This is the workflow you can repeat for every new video.
Final Thoughts
So, guys, this is the complete workflow.
The biggest advantage of this system is that AI can significantly reduce the amount of repetitive production work involved in running a YouTube channel.
You can use AI for:
- Topic research
- Brainstorming
- Script development
- Script improvement
- Voiceover
- Image prompts
- Image generation
- Thumbnail concepts
- Video analysis
But don’t make the mistake of thinking that AI means zero effort.
The tools can help you produce content faster, but the decisions that actually make a channel successful still require human creativity.
Your topic selection matters.
Your research matters.
Your storytelling matters.
Your thumbnail matters.
Your retention matters.
And most importantly, your ability to give viewers something genuinely interesting matters.
If you’re serious about YouTube automation, don’t build a channel around copying another creator. Study what works, understand why it works, and then create your own version with an original angle.
That is the difference between simply producing AI videos and actually building a YouTube channel.
And remember: YouTube’s monetization policies focus on original and authentic value, so always make sure your final content is meaningfully different, useful or entertaining, and not simply mass-produced from the same template.
If you enjoyed this guide, make sure to keep improving your workflow with every video.
Good luck with your YouTube journey!