How to Create Viral AI British Satire Videos Without Showing Your Face
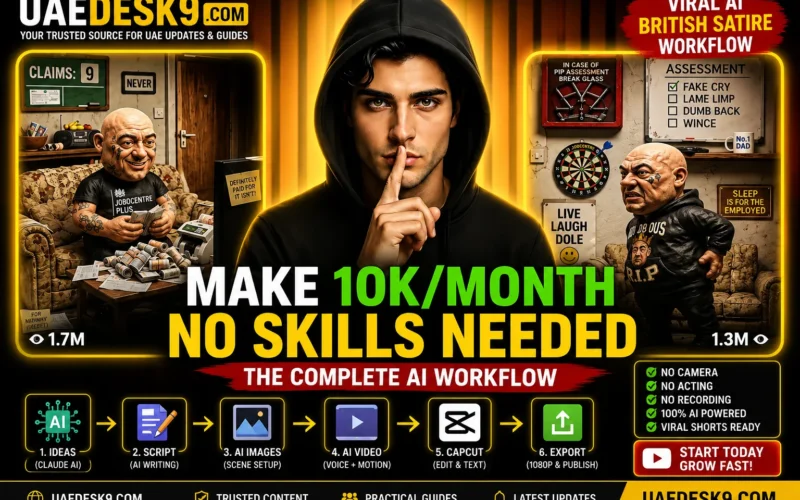
1.7 million views. 1.3 million views on another video.
One page has built a huge audience by creating brutal British satire around benefit culture, council estate life, and everyday situations — and the entire content pipeline is powered by AI.
The creator has reportedly turned the workflow into a £34.99 blueprint. But here’s the thing: you don’t necessarily need to buy a blueprint to understand the basic process.
In this guide, I’m breaking down the complete workflow so you can understand how this type of AI-generated British comedy content can be created from idea generation all the way to the final edit.
The workflow uses AI for ideas, scripts, image generation, video generation, voice, and editing.
Let’s break it down.
Step 1: Generate Your Video Ideas With Claude
The first tool in the workflow is Claude.
Claude is an AI assistant that can be used for writing, brainstorming, research, summarization, and creative work.
The workflow starts with three prompts:
- Idea generation
- Script writing
- Scene and video prompts
The important part is that each prompt feeds into the next.
Instead of asking AI for random ideas, the first prompt establishes Claude as a strategist specifically for your content style.
For this example, the channel focuses on savage British satire, particularly topics such as:
- The welfare system
- The DWP
- Council estate life
- PIP assessments
- Housing inspections
- Job centres
- Everyday working-class situations
- British cultural references
The key is cultural specificity.
A British viewer should instantly understand the situation you’re describing.
For example, instead of a generic title like:
“A Funny Government Office Story”
You could use a more specific concept such as:
“POV: Average PIP Assessment”
Or:
“POV: Council Housing Inspection Goes Badly”
This type of title immediately gives viewers context.
Why the Idea Matters
The most important rule here is simple:
If the idea doesn’t make you laugh, don’t expect the audience to laugh.
You need a concept that creates an obvious visual situation and gives the script plenty of opportunities for jokes.
For this example, let’s choose:
“POV: Council Housing Inspection Goes Badly.”
It’s a familiar setup, but it can be exaggerated into absurd visual comedy.
For example, imagine an overcrowded family frantically trying to hide relatives inside a wardrobe before the housing inspector arrives.
That’s the type of ridiculous visual premise that can work well in short-form comedy.
Step 2: Turn the Idea Into a Full Comedy Script
Once you’ve selected your concept, move on to the second prompt.
This prompt turns the idea into a complete short-form script.
The AI is instructed to act as a British dark-comedy writer, focusing on:
- Fast dialogue
- Sharp punchlines
- Strong comedic timing
- British references
- Character interactions
- Visual comedy
- Short-form pacing
This is arguably the most important stage of the entire workflow.
The AI can generate the characters, dialogue, scene beats, and punchlines, but you should still review everything manually.
AI-generated comedy can sometimes feel repetitive or unnatural, so don’t simply copy the first output and publish it.
Take the strongest jokes, remove anything weak, and make sure the dialogue sounds natural for the audience you’re targeting.
Paste your chosen concept into the prompt and generate the script.
You should end up with something similar to a mini screenplay containing:
Characters → Dialogue → Actions → Scene beats → Punchlines
Now you’ve got the foundation for the video.
Step 3: Break the Script Into Individual Scenes
The third prompt takes the finished script and transforms it into shot-by-shot visual prompts.
This is where the workflow becomes much more useful for AI video creation.
Instead of asking an image or video generator to create the entire story at once, you break it into individual scenes.
For example:
Scene 1
The housing inspector arrives outside the property.
Scene 2
The family panics after hearing the door knock.
Scene 3
Several relatives desperately try to hide inside a wardrobe.
Scene 4
The inspector enters the room.
Scene 5
The wardrobe starts making suspicious noises.
Each scene receives its own visual prompt and corresponding dialogue or motion instructions.
The style can be kept gritty, realistic, and visually exaggerated.
The trick is to combine two things:
A funny visual + a sharp line.
The visual gets the viewer’s attention, while the dialogue delivers the punchline.
That’s what makes the format work.
Step 4: Generate the Images
Once you have the scene prompts, it’s time to create your visuals.
The original workflow uses an AI image-generation platform and starts with images before turning those images into videos.
For each scene, choose the appropriate image model and use a landscape format such as 9:6, if that is the format supported by your chosen tool.
Then paste the first image prompt generated from your scene list.
Generate the image and check it carefully.
You want consistency between scenes.
Try to maintain the same:
- Characters
- Clothing
- Location
- Lighting
- Visual style
- Facial appearance
- Overall atmosphere
This is especially important when you’re creating a story rather than a collection of unrelated clips.
Step 5: Turn the Images Into AI Videos
Once your images are ready, the next step is image-to-video generation.
Many modern AI video platforms allow you to take an existing image and use it as the starting frame for a video.
The basic workflow is:
Image → Motion Prompt → Dialogue/Audio → Video Clip
Select the image-to-video option and upload or carry over your generated image.
If you’re using a model such as Kling or another image-to-video system, choose the model available to you and enable audio or speech generation if your selected tool supports it.
The audio can be extremely important for comedy.
Imagine a character delivering an absurd line in an exaggerated British accent.
The delivery itself can become part of the joke.
Paste the matching motion and speech instructions generated from your script breakdown and generate the clip.
Then repeat the process for every scene.
Don’t Try to Generate Everything in One Shot
This is one of the biggest advantages of the workflow.
Instead of asking AI to create a complete 30–60 second comedy video in one generation, create several short clips.
That gives you much more control over:
- Timing
- Character consistency
- Punchlines
- Camera movement
- Dialogue
- Transitions
- Editing
You can then assemble everything together during the editing stage.
Step 6: Edit Everything in CapCut
Now it’s time for the final edit.
CapCut supports timeline editing, text overlays, audio, transitions, effects, captions, and different export settings.
Create a new project and choose the appropriate aspect ratio for your short-form platform.
Then import all of your AI-generated clips and place them on the timeline in the correct order.
The editing doesn’t need to be complicated.
In fact, for this type of content, fast pacing and clear jokes are more important than excessive effects.
Add a Strong Text Overlay
One of the recognizable elements of this format is the large text at the top of the screen.
Use something like:
POV: Council Housing Inspection Goes Badly
Or:
POV: Average PIP Assessment
The text immediately tells the viewer what the joke is about.
That’s particularly useful for short-form videos because viewers are scrolling quickly.
The first few seconds need to communicate the premise immediately.
Add Background Music
You can also add background music that matches the style of the video.
A UK drill or rap-inspired instrumental can complement this type of British satire and reinforce the overall aesthetic.
However, make sure the music doesn’t overpower the dialogue.
The joke is the main event.
If the audience can’t clearly hear the character, the music is working against you.
Also, only use music that you have the appropriate rights or permission to use.
What If Auto-Captions Don’t Work?
Here’s another practical issue you may encounter.
AI-generated speech doesn’t always get detected correctly by automatic captioning systems.
If the captions aren’t accurate, don’t waste time fighting the tool.
You can simply add important dialogue manually.
CapCut also provides automatic caption and speech-to-text features, although results can vary depending on the audio and workflow.
For comedy content, manually correcting the captions can actually be worthwhile because you can emphasize specific words and punchlines.
Step 7: Export Your Final Video
Once everything is edited, watch the complete video from beginning to end.
Check:
- Is the opening hook strong?
- Is the joke understandable?
- Does the dialogue sound natural?
- Are the characters consistent?
- Is the music too loud?
- Are the captions readable?
- Are the clips moving quickly enough?
- Does the punchline land?
Then export the final video at 1080p or another appropriate high-quality setting supported by your platform.
CapCut allows creators to customize resolution, frame rate, format, and other export settings.
And that’s it.
You’ve gone from:
Idea → Script → Scene Prompts → Images → AI Video → Editing → Final Short
all using an AI-assisted workflow.
The Complete AI British Satire Workflow
Here’s the entire process in simple terms:
1. Find a strong idea
Create a culturally specific British comedy concept.
2. Write the script
Use AI to develop the characters, dialogue, timing, and punchlines.
3. Break it into scenes
Turn the script into individual image, motion, and dialogue prompts.
4. Generate images
Create consistent visuals for each scene.
5. Animate the images
Use an image-to-video model to turn the still images into moving clips.
6. Add dialogue and audio
Generate or add appropriate speech and background music.
7. Edit in CapCut
Put the clips together, add text, captions, music, and timing adjustments.
8. Export
Render the final video and publish it as a short-form video.
You Don’t Need to Copy Someone Else’s Channel
The biggest takeaway isn’t the specific council-estate or benefits theme.
It’s the production system.
You can use the same basic workflow for many different faceless content ideas.
For example:
- British workplace comedy
- UK landlord and tenant satire
- Customer service comedy
- Office humour
- British family comedy
- Travel satire
- Historical comedy
- Gaming comedy
- AI-generated fictional characters
- Everyday British-life situations
The workflow stays almost identical.
The niche changes.
The characters change.
The jokes change.
But the production pipeline remains:
Research → Idea → Script → Scenes → Visuals → Video → Edit → Publish
One Important Warning About AI Content
There’s a difference between using AI as a production tool and simply mass-producing low-effort videos.
If you’re building a channel for the long term, don’t rely on AI to do everything without human input.
Add your own creative direction.
Rewrite weak jokes.
Improve the pacing.
Create original characters.
Develop a recognizable visual identity.
And most importantly, make sure your content provides genuine entertainment rather than simply producing hundreds of nearly identical AI clips.
AI can make production faster, but the idea and execution are still what make a video worth watching.
Final Thoughts
The interesting part of this workflow is how many traditionally time-consuming steps can now be handled with AI.
You don’t need a camera crew.
You don’t necessarily need actors.
You don’t need to record every scene yourself.
You can start with a simple idea, turn it into a script, generate visual scenes, animate those scenes, add dialogue, and finish everything inside a video editor.
Claude can help with the creative and writing stages, while AI image/video tools can handle much of the visual production. CapCut can then bring everything together in the final edit. Anthropic describes Claude as an AI assistant capable of creative writing and other text-based tasks, while CapCut provides AI-assisted editing, captions, text-to-speech, and other creator tools.
And that’s the real opportunity.
You don’t have to buy a £34.99 blueprint just to understand the basic concept.
The tools are accessible. The workflow is straightforward. The difficult part is coming up with ideas people actually want to watch.
Once you solve that part, the rest becomes a repeatable production system.
Useful Tools
- Claude by Anthropic — AI writing, brainstorming, research, and creative assistance.
- CapCut Video Editor — Video editing, captions, text, music, AI tools, and exporting.
- Discord — Community platform that can be used for creator communities and sharing resources.